- Grade Level
- Middle school / junior high school (grades 5/6/7–8/9) from 11 to 15 years old
- High School / College Level / Girls, Women 16 -30 Art, Design, Human tech.
- Subjects
Technology: Skills in 3D scanning, computer-aided design (CAD), and CNC machining.
- Duration
Total Time: 4 hours (Can be divided into 4 sessions)
- Session 1: Introduction to 3D Scanning and Face Scanning (1 hour)
- Session 2: Editing and Converting the Scan to an STL File (1 hour)
- Session 3: Preparing the STL File for CNC Machining (1 hour)
- Session 4: CNC Machining a 3D Model (3 hour)
- Learning Outcomes
Students will learn how to scan a human face, convert the scan to an STL file, and observe how a CNC router is used to machine the 3D model. This project integrates skills in 3D scanning, computer-aided design (CAD), and CNC machining.
- B&T dimensions and types covered
Dimension
2 Confidence in technological progress and 3. Interest in New Technology: By learning how to scan a human face, convert the scan to an STL file, and learning how a CNC router is used.
Types:
- Explorer: Through the exercise the student gets to explore exiting new things available with scanning, 3D and CNC.
- Safety Rules & Tips CNC
Personal protection:
- Always wear safety glasses, hearing protection, and safety shoes
- No loose clothing, jewelry, or long hair (risk of entanglement)
- Do not wear gloves while the machine is running
Machine setup check:
- Emergency stop works
- Guards and doors are closed
- Workpiece is clamped securely
- Tools are tightened and correct for the job
- Verify coolant level and tool offsets
Programming & start-up:
- Simulate or dry-run new CNC programs first
- Start with reduced feed or single-block mode
- Double-check zero points and tool numbers
During operation:
- Keep hands away from moving parts
- Use a brush or hook to remove chips — never your hands
- Stop the machine if you hear abnormal noise, vibration, or see smoke
- Wait for the spindle to stop completely before touching anything
Emergency procedures:
- Know where the emergency stop, main switch, and fire extinguisher are
- In case of malfunction or injury: stop the machine and report immediately
- Teacher Prerequisite Knowledge
The teacher(s) for this lesson need skills in 3D scanning. They also need experience using and teaching the use of the CNC. Safety is key in this lesson as the CNC is a machine, knowledge about safety in a workspace is needed. Optional, the CNC part of this project can be switched to 3D printing.
- Materials
Materials Needed:
- 3D scanner (e.g., Sense, Structure Sensor, Artec Eva, or similar)
- Computer with 3D scanning software (e.g., Meshmixer, Blender, or similar)
- CAD software (e.g., Fusion 360, Tinkercad, Aspire or similar)
- CNC router
- Material for CNC machining (plywood or Blue styrofoam, machinable wax or something thicker than 40mm )
- Safety equipment (goggles, ear protection, dust mask)
- USB drive or other data transfer methods
- Lesson Plan
Introduction
Session 1: Introduction to 3D Scanning and Face Scanning (1 hour)
Step 1: Introduction (15 minutes)
- Briefly explain the project and its components.
- Discuss the principles of 3D scanning and its applications.
- Introduce the concept of converting a scanned object into a digital model for CNC machining.
Step-by-step development
Step 2: Setting Up the 3D Scanner (15 minutes)
- Demonstrate how to set up and calibrate the 3D scanner.
- Explain the importance of proper calibration for accurate scans.
Step 3: Scanning a Human Face (30 minutes)
- Choose a volunteer for the face scan.
- Show how to position the scanner and subject for optimal results.
- Guide students through the process of scanning the face, capturing all necessary angles.
- Split the face in half.
Session 2: Editing and Converting the Scan to an STL File (1 hour)
Step 1: Importing the Scan (15 minutes)
- Demonstrate how to import the scan into 3D editing software.
- Explain the basic interface and tools of the software being used.
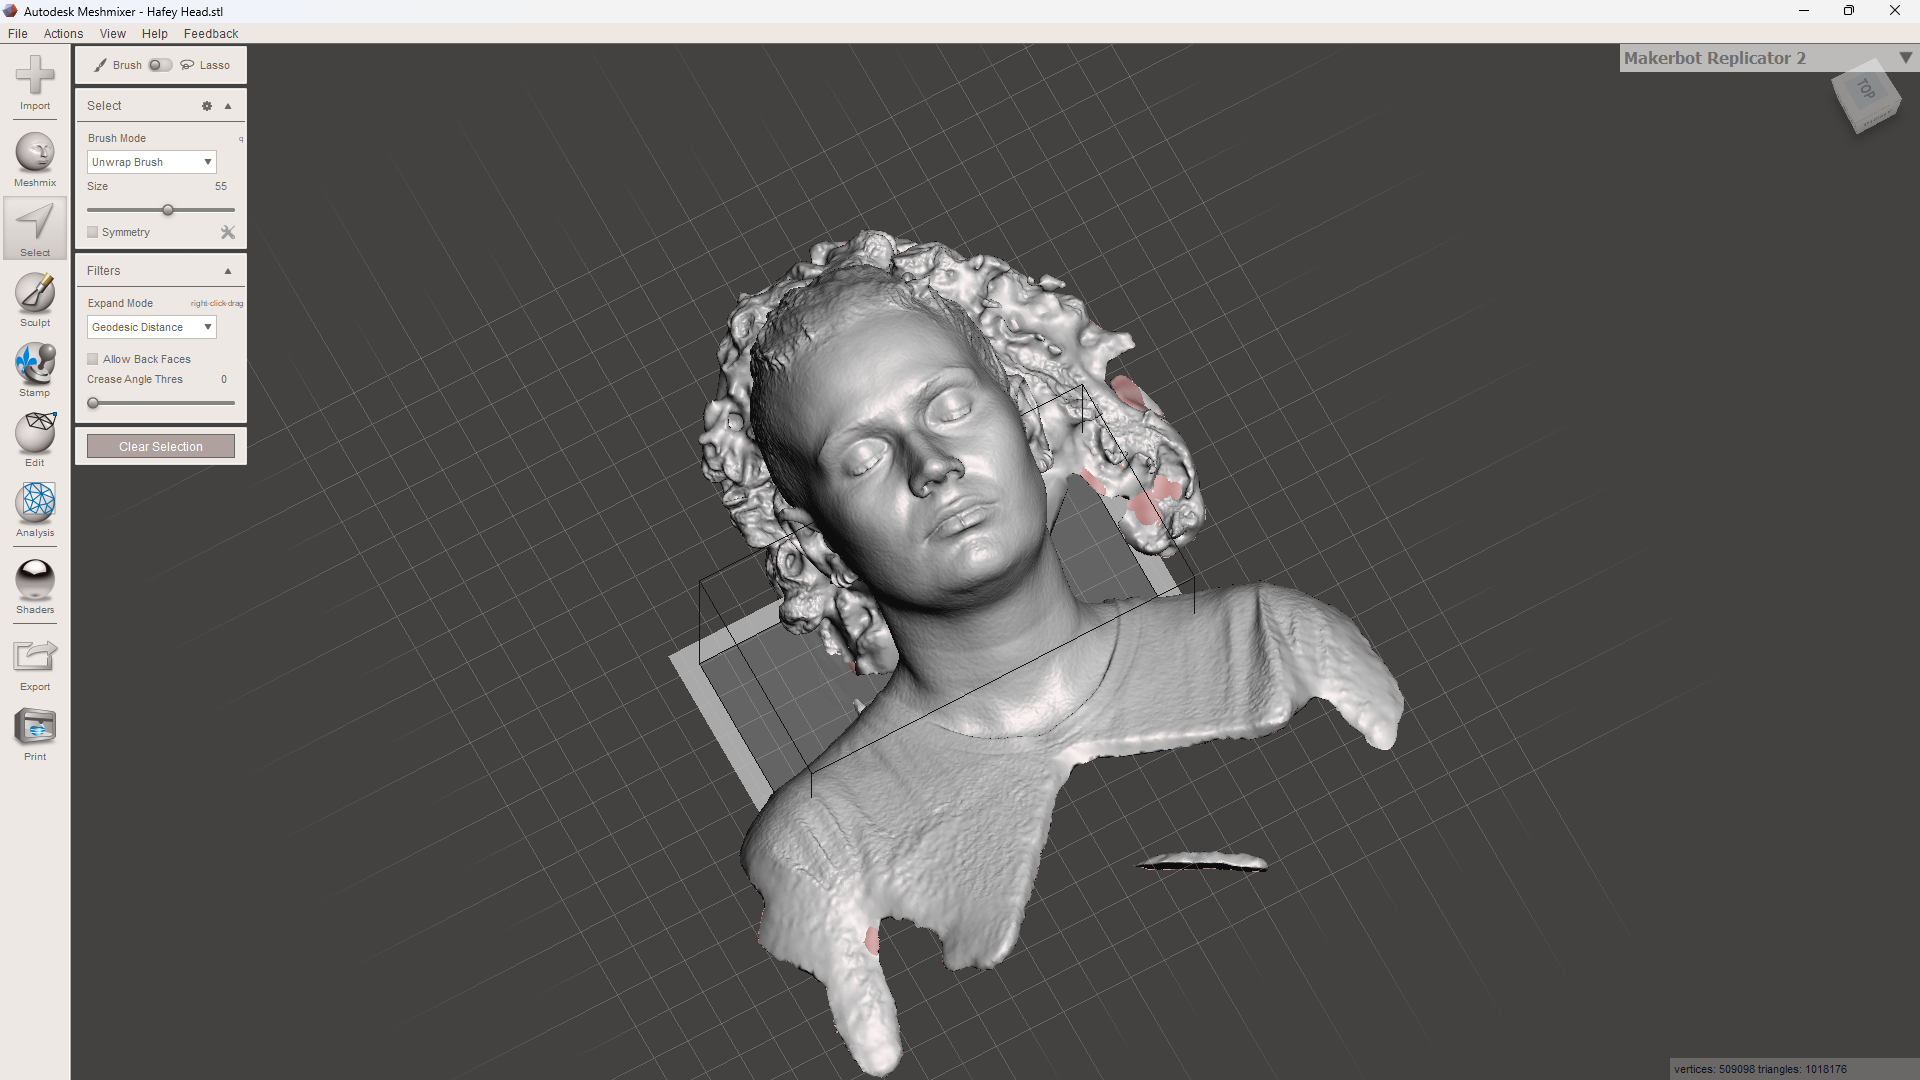
Step 2: Cleaning Up the Scan (20 minutes)
- Show how to clean up the scan by removing any unwanted parts or noise.
- Teach students how to fill holes and smooth surfaces to improve the quality of the 3D model.
- Split the face in half and lay flat.
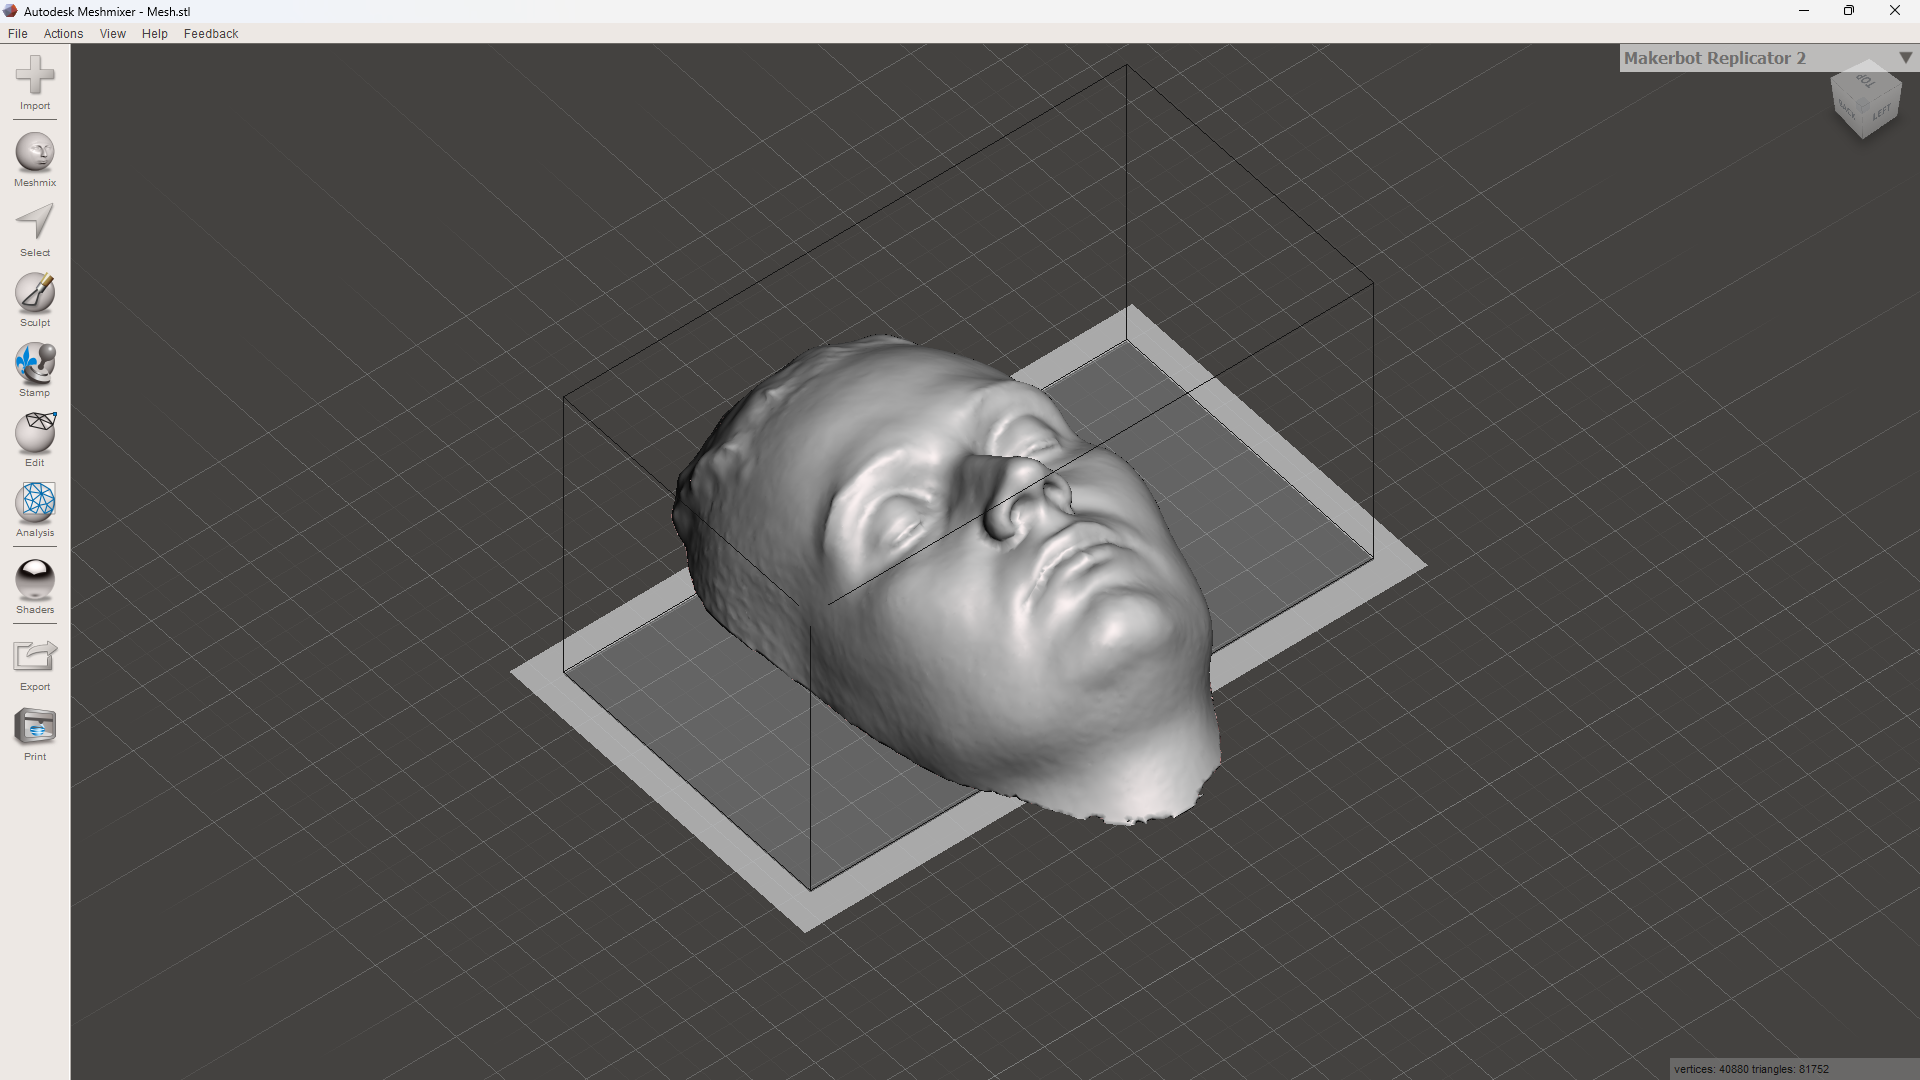
Step 3: Converting to STL (25 minutes)
- Guide students through the process of converting the cleaned-up scan to an STL file.
- Explain the importance of exporting the file in the correct format for CNC machining.
Session 3: Preparing the STL File for CNC Machining (1 hour)
Step 1: Importing the STL into CAD Software (15 minutes)
- Demonstrate how to import the STL file into CAD software.
- Explain the basic tools and interface of the CAD software.
Step 2: Preparing the Model for CNC Machining (30 minutes)
- Show how to orient the model for optimal machining.
- Lay the (half) face looking up.
- Explain how to set the dimensions, scale, and create supports/bridges* if necessary. (*small parts of wood to keep the model in place)
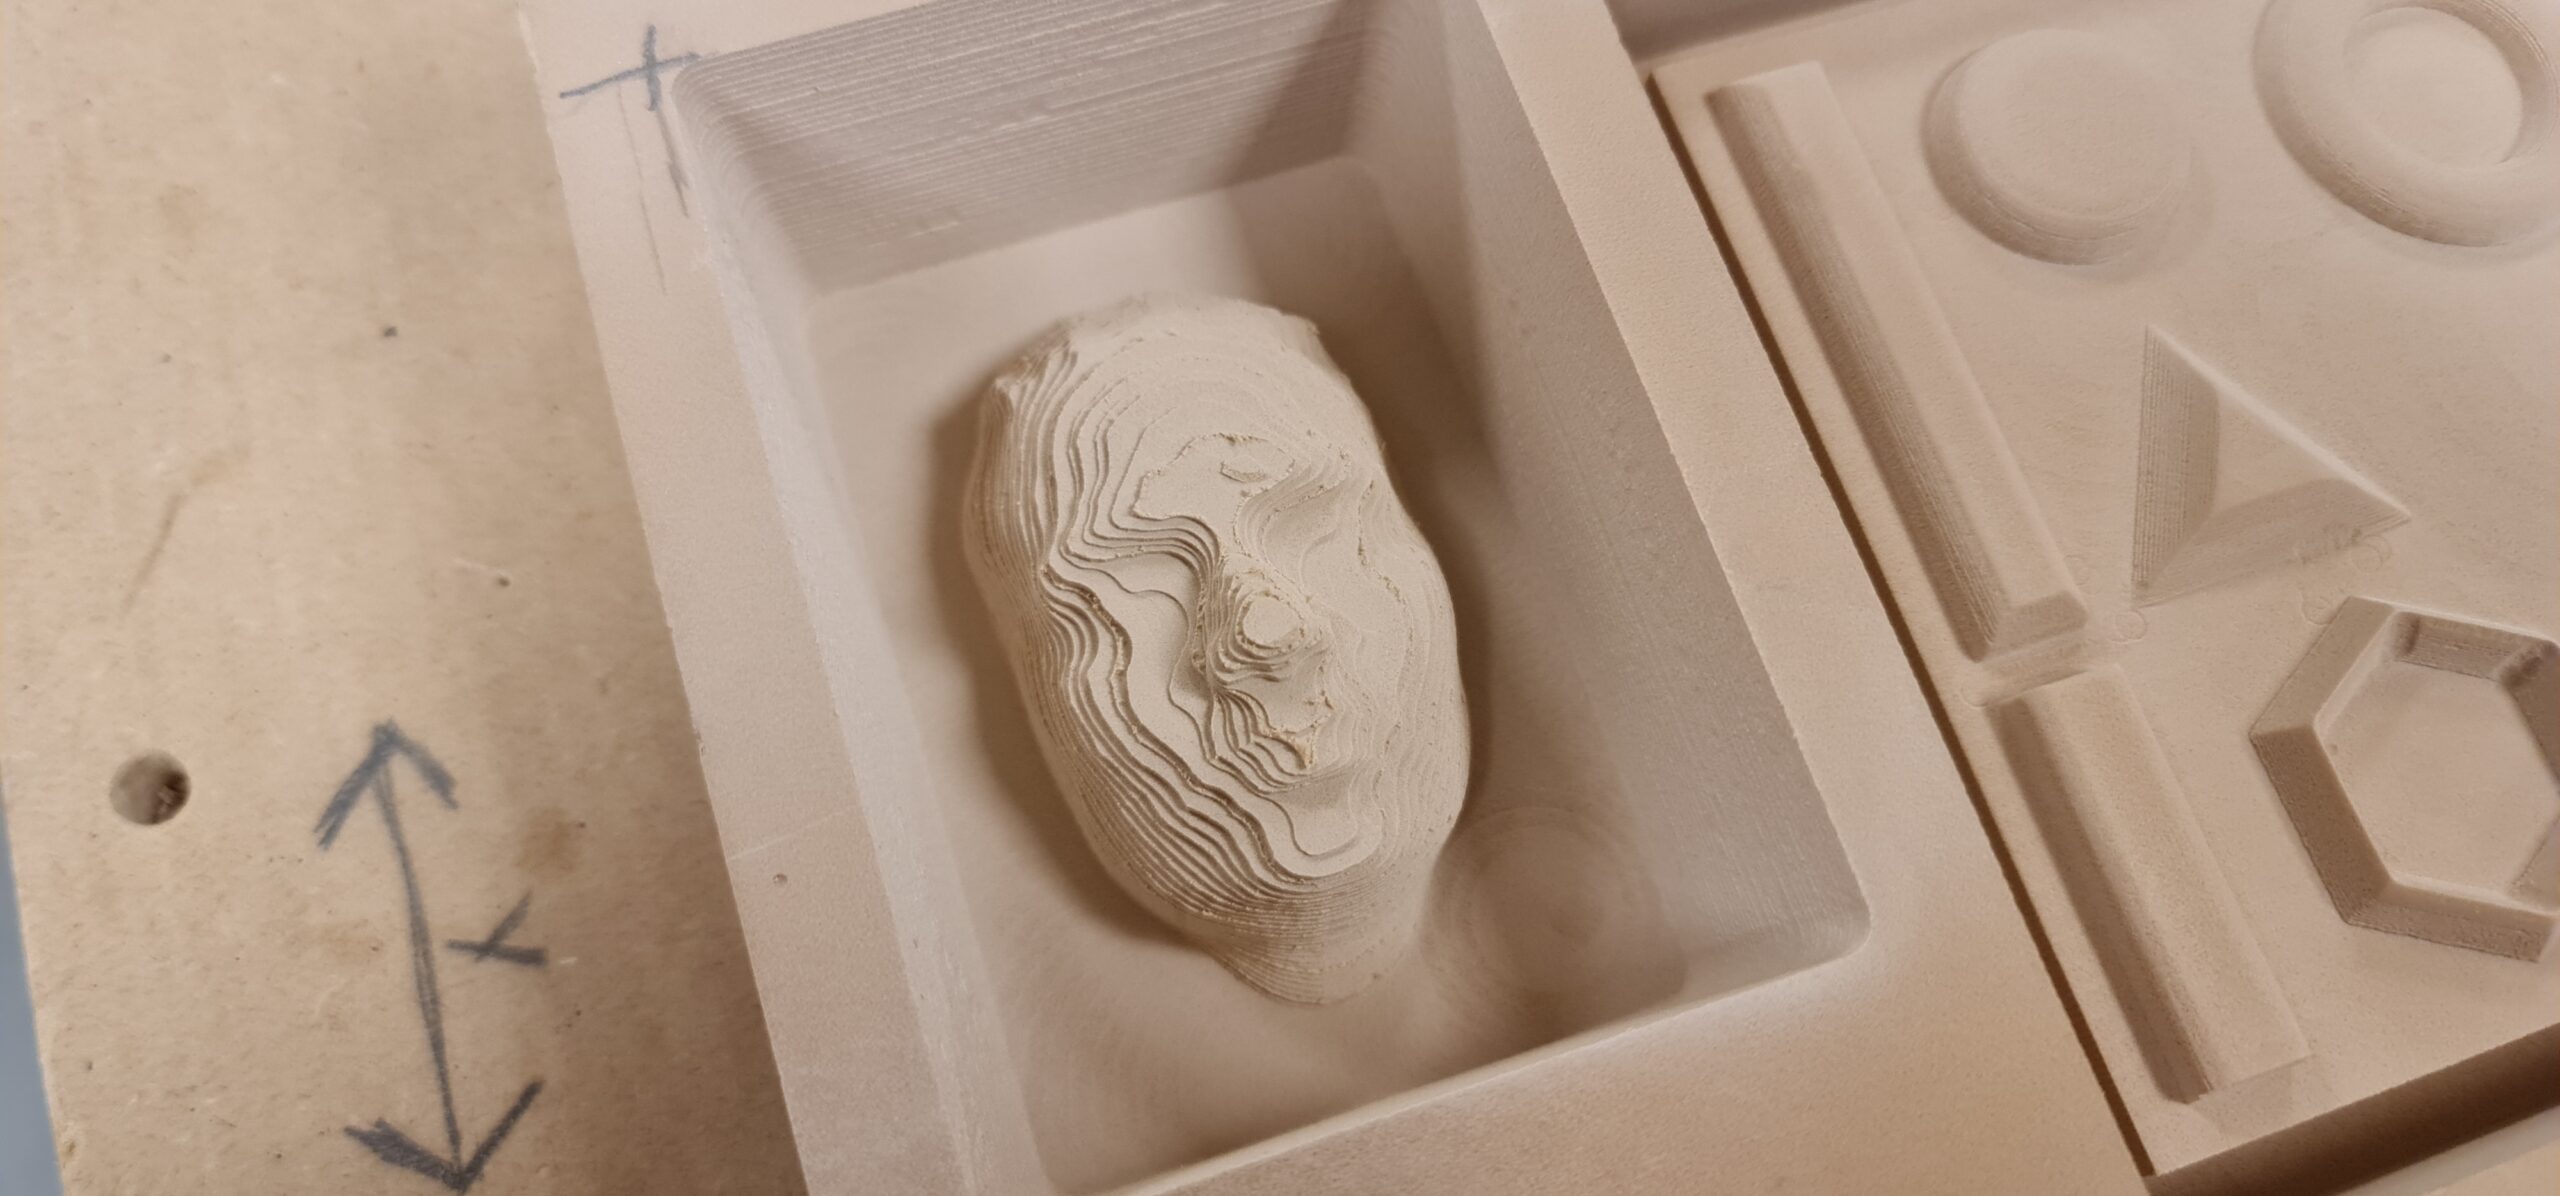
- Teach students how to generate toolpaths for the CNC router.
Step 3: Exporting the G-code (15 minutes)
- Guide students through the process of exporting the prepared model as G-code.
- Explain the importance of correct settings for the material and CNC router being used.
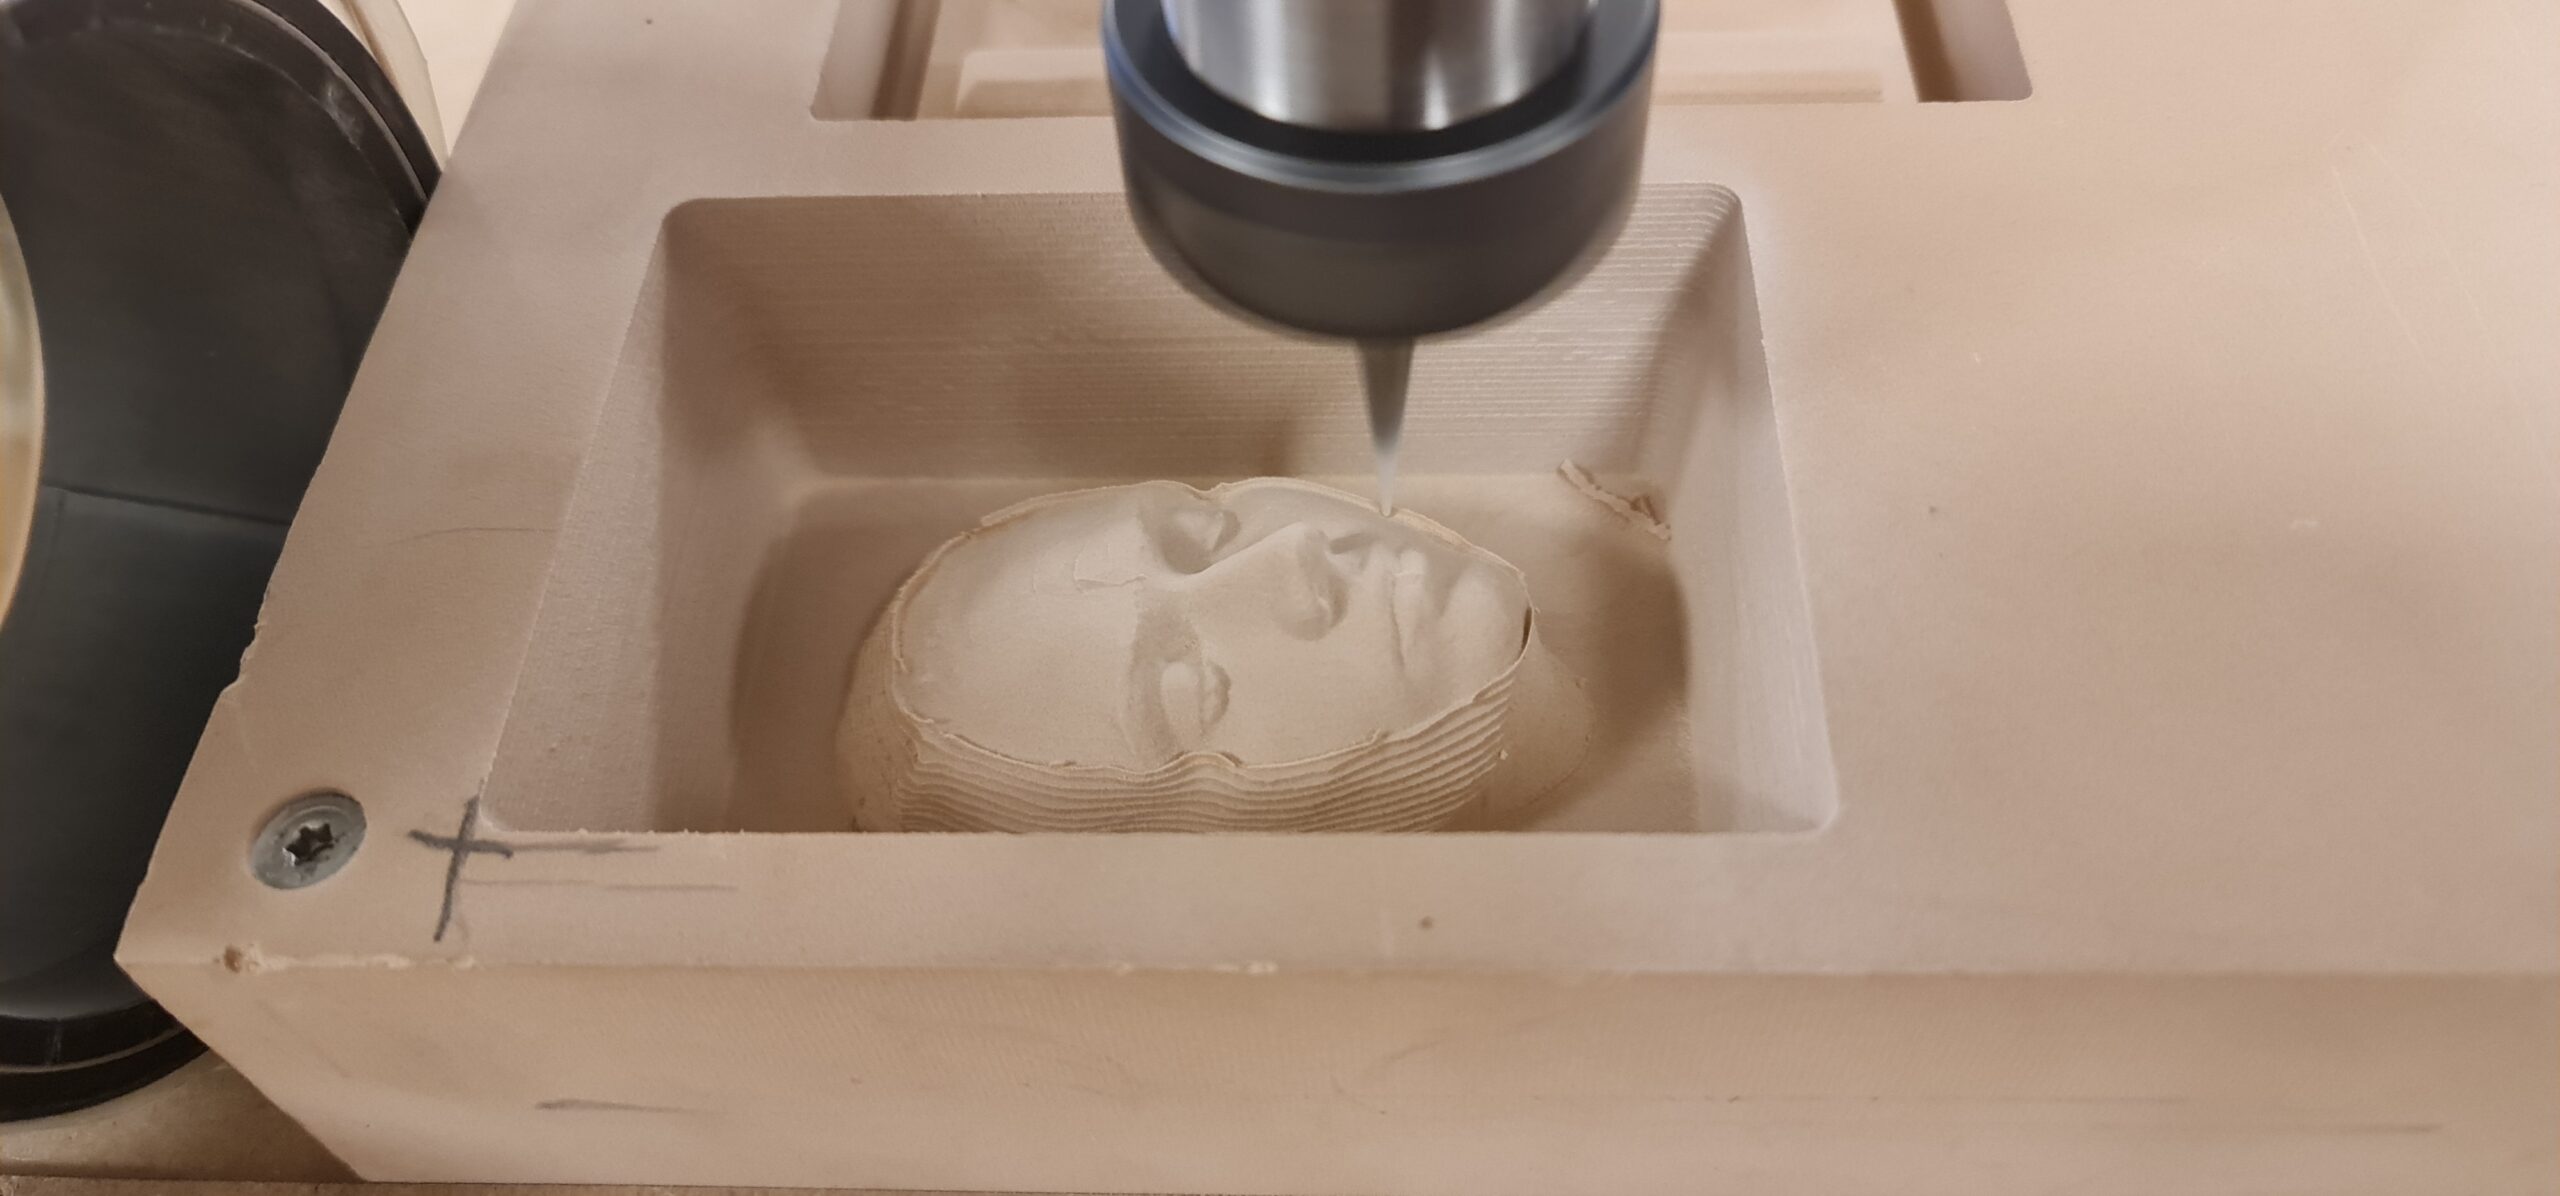
Session 4: CNC Machining a 3D Model (3 hour)
Step 1: Setting Up the CNC Router (30 minutes)
- Demonstrate how to set up the CNC router, including securing the material and loading the G-code.
- Emphasize safety procedures and the use of safety equipment.
Step 2: Machining the Model (2 hours and 30 minutes)
- Show how to start the CNC machining process and monitor its progress.
- Allow students to observe the machining process and discuss the steps involved.
- Wrap-up & Reflection
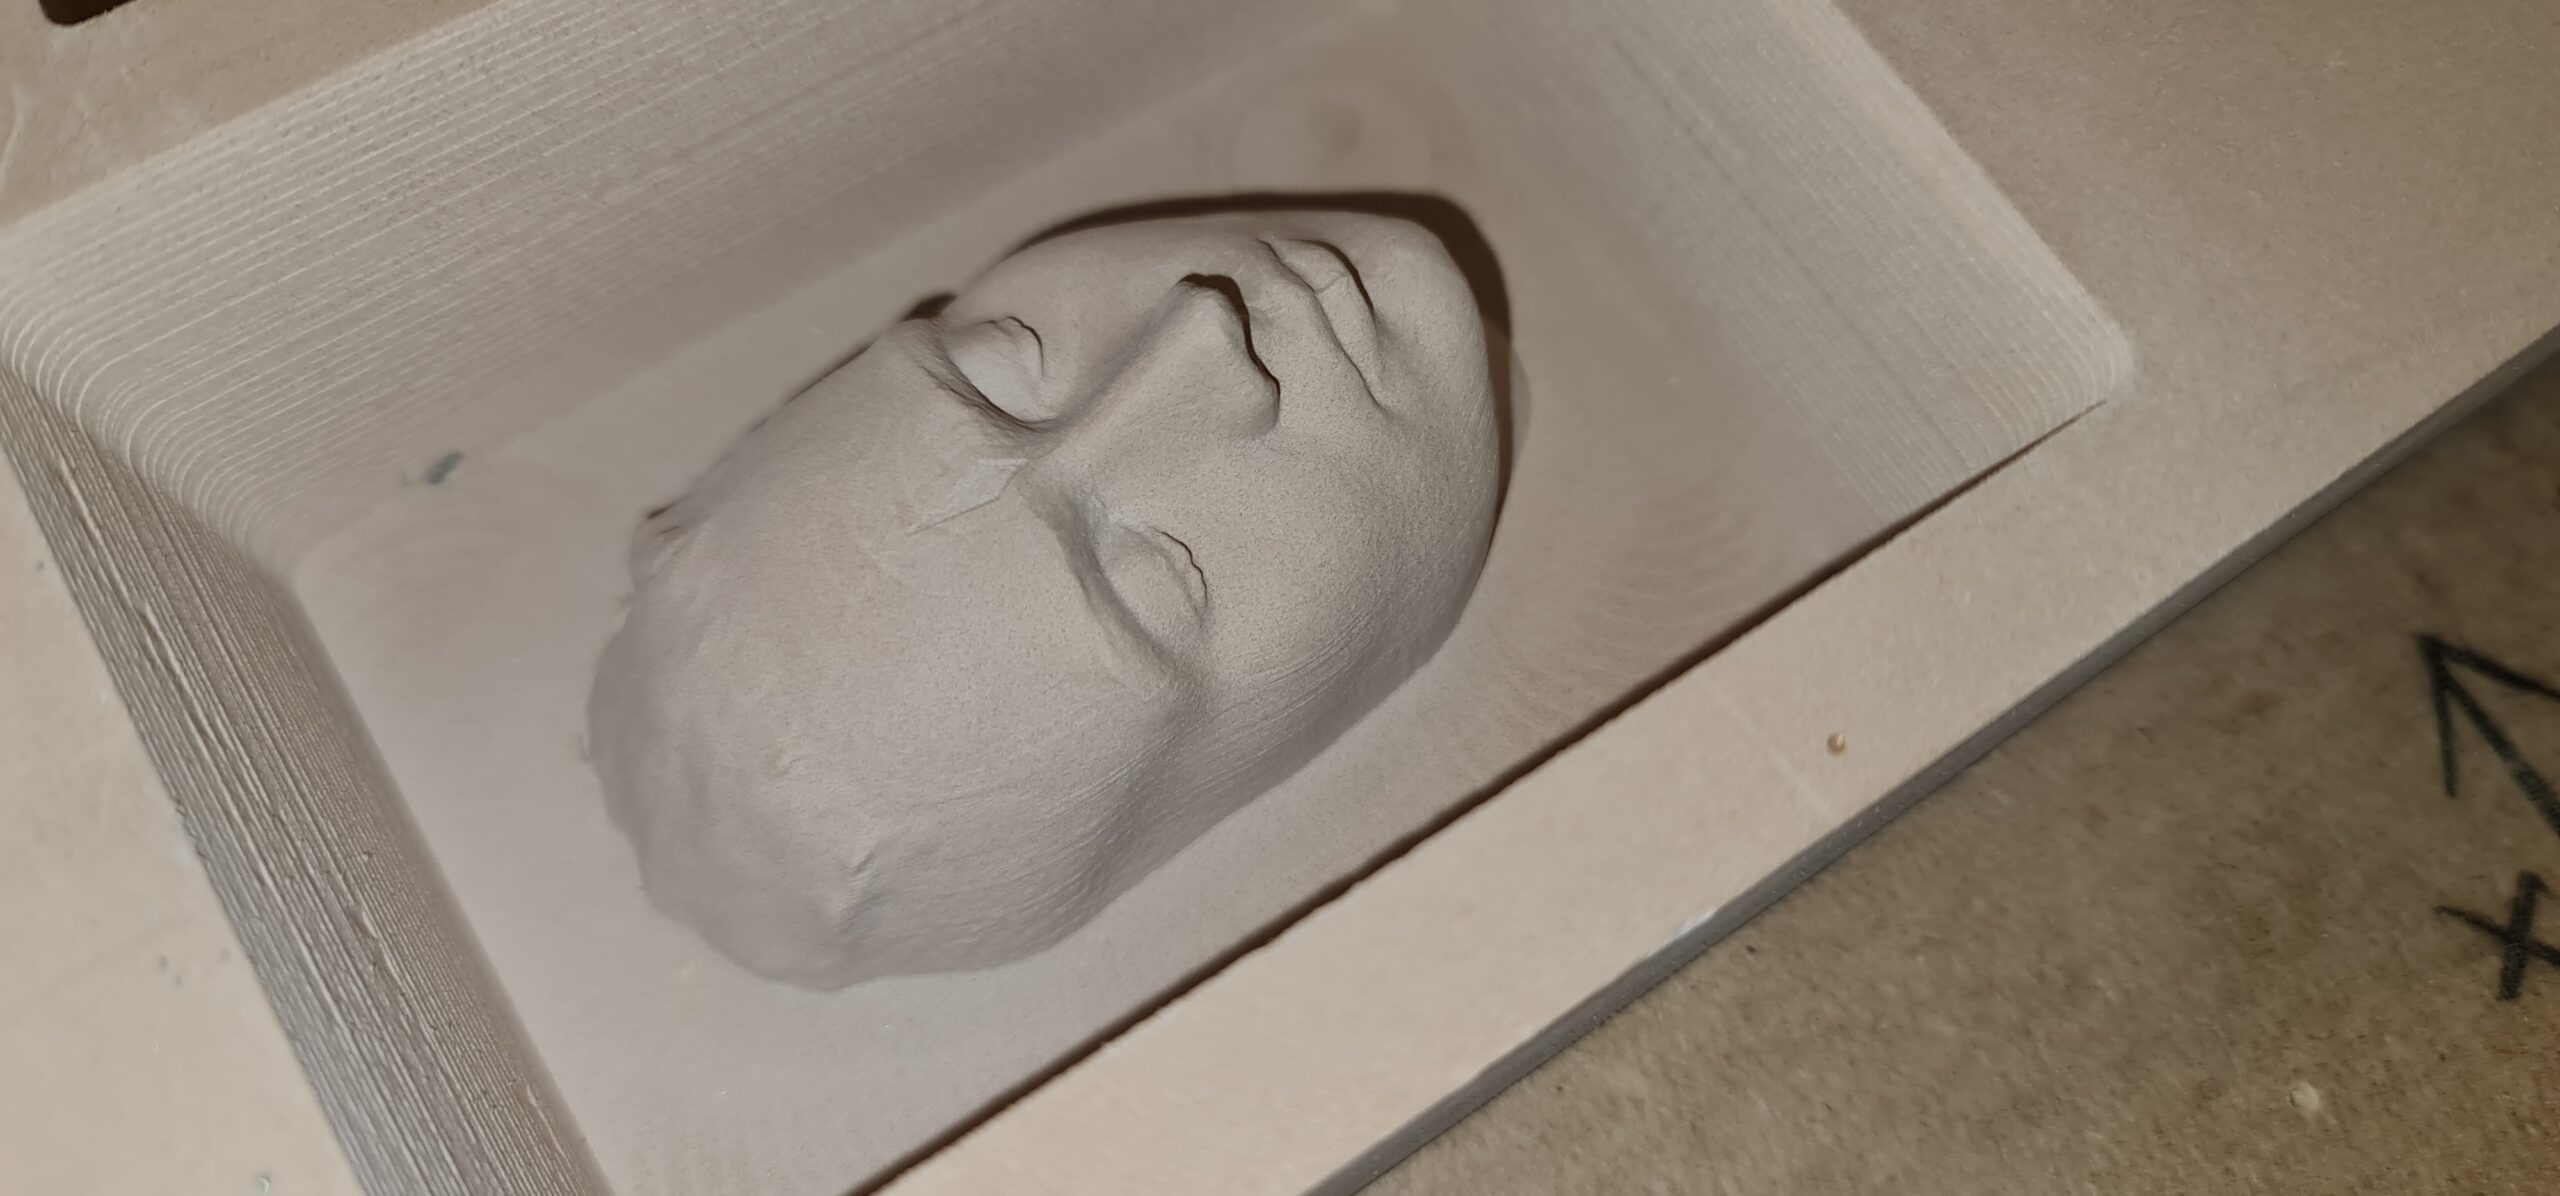
Step 3: Finishing Touches and Evaluation (15 minutes)
- Demonstrate how to remove the finished model from the CNC router and clean up any rough edges.
- Discuss the outcome of the project and any challenges faced during the process.
Encourage students to reflect on what they learned and how they could apply these skills in future
- Photo Gallery
- Extension Activities
- Experiment with scanning different objects and creating STL files for CNC machining.
- Modify the STL file to add personalized features or designs before machining.
- Explore different materials and settings for CNC machining to see how they affect the final product.
- Using plywood to CNC route will give a nice design in layers
Assessment:
- Students will be assessed on their ability to scan a face, clean and convert the scan to an STL file, prepare the model for CNC machining, and successfully machine the model.
- Participation in discussions and troubleshooting sessions will also be considered.

